
How To Hang Pictures
Learning how to hang pictures seems like a relatively easy home improvement course. Select the art you want to hang, and off you go. However, hanging a new set of paintings or a collection of family photos can turn into an overwhelming project if you do not spend the time required to plan how you want the arrangement of pictures and/or photographs to look.
You must also use the right tools to get the job done, such as obtaining a hammer, tape measure, and a carpenter’s level at least 24 inches long. Organizing two picture hooks and two D-rings per object completes the tool procurement project. One important note: You might need more than two picture hooks and two D-rings to hang larger pictures and photographs.
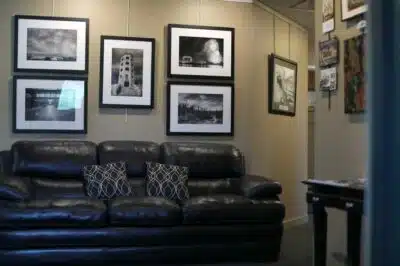 How to Hang Pictures at Home
The standard advice for how to hang pictures is to place them at eye level. But the conventional wisdom does not consider the architecture of your home and the type of furniture you have put in the room where you plan to complete your picture hanging project.
Let’s learn how to hang your paintings and/or photographs at eye level as a starting point for your picture-hanging project.
Accurate Measuring
To hang a picture or photo at eye level, you must achieve an exact measurement using the tape measure. You also can go by instinct, which means you can be less precise.
The standard height for eye level for hanging pictures and photographs is between 57 and 60 inches. Measure between 57 and 60 inches from the floor and use the carpenter’s level to ensure a straight line. Measure the length of the picture or photo, then make two small marks on the wall where you plan to hammer the picture hooks.
Balanced Hanging
Using two picture hooks prevents the picture from tilting off-center. Attach two D-rings on the back of the picture frame directly opposite on the same level plane. Check the marks you made for the two hooks to ensure they are the same height. Hammer each picture hook into the wall where you made the marks, then hook the D-rings on the hooks to complete the hanging process.
How to Arrange Pictures on a Wall
The key to hanging pictures on a wall is to accomplish symmetry. Although you want your newly hung pictures to look similar, certain factors can change how you arrange art on a wall.
First, you should hang the pictures that share a common theme close to each other. For example, a set of family photographs should hang close together to achieve the symmetry you want. For artwork, you should determine whether some of the pieces share a common artistic theme and make sure to hang similarly themed pictures together.
Another factor to consider concerns the furniture in a room. Furniture such as a sofa or couch diminishes the impact of the hanging-height rule of between 57 and 60 inches. In a room full of furniture, you should hang pictures between six and 12 inches above the most prominent furniture. Photographs work well when hung on a wall above smaller furniture like an office desk.
Learn More About How to Hang Pictures
Founded more than 50 years ago, Walker Display helps clients choose the right type of picture-hanging system to enhance the ambiance of any room. Our clients include architecture firms such as Wiehle Carr, Maurer Architecture, and Penn Engineering.
Before starting your picture-hanging project, contact Walker Display to discover the right home, business, or institution system.